What is the Emporia Vue?
Full in Depth Video
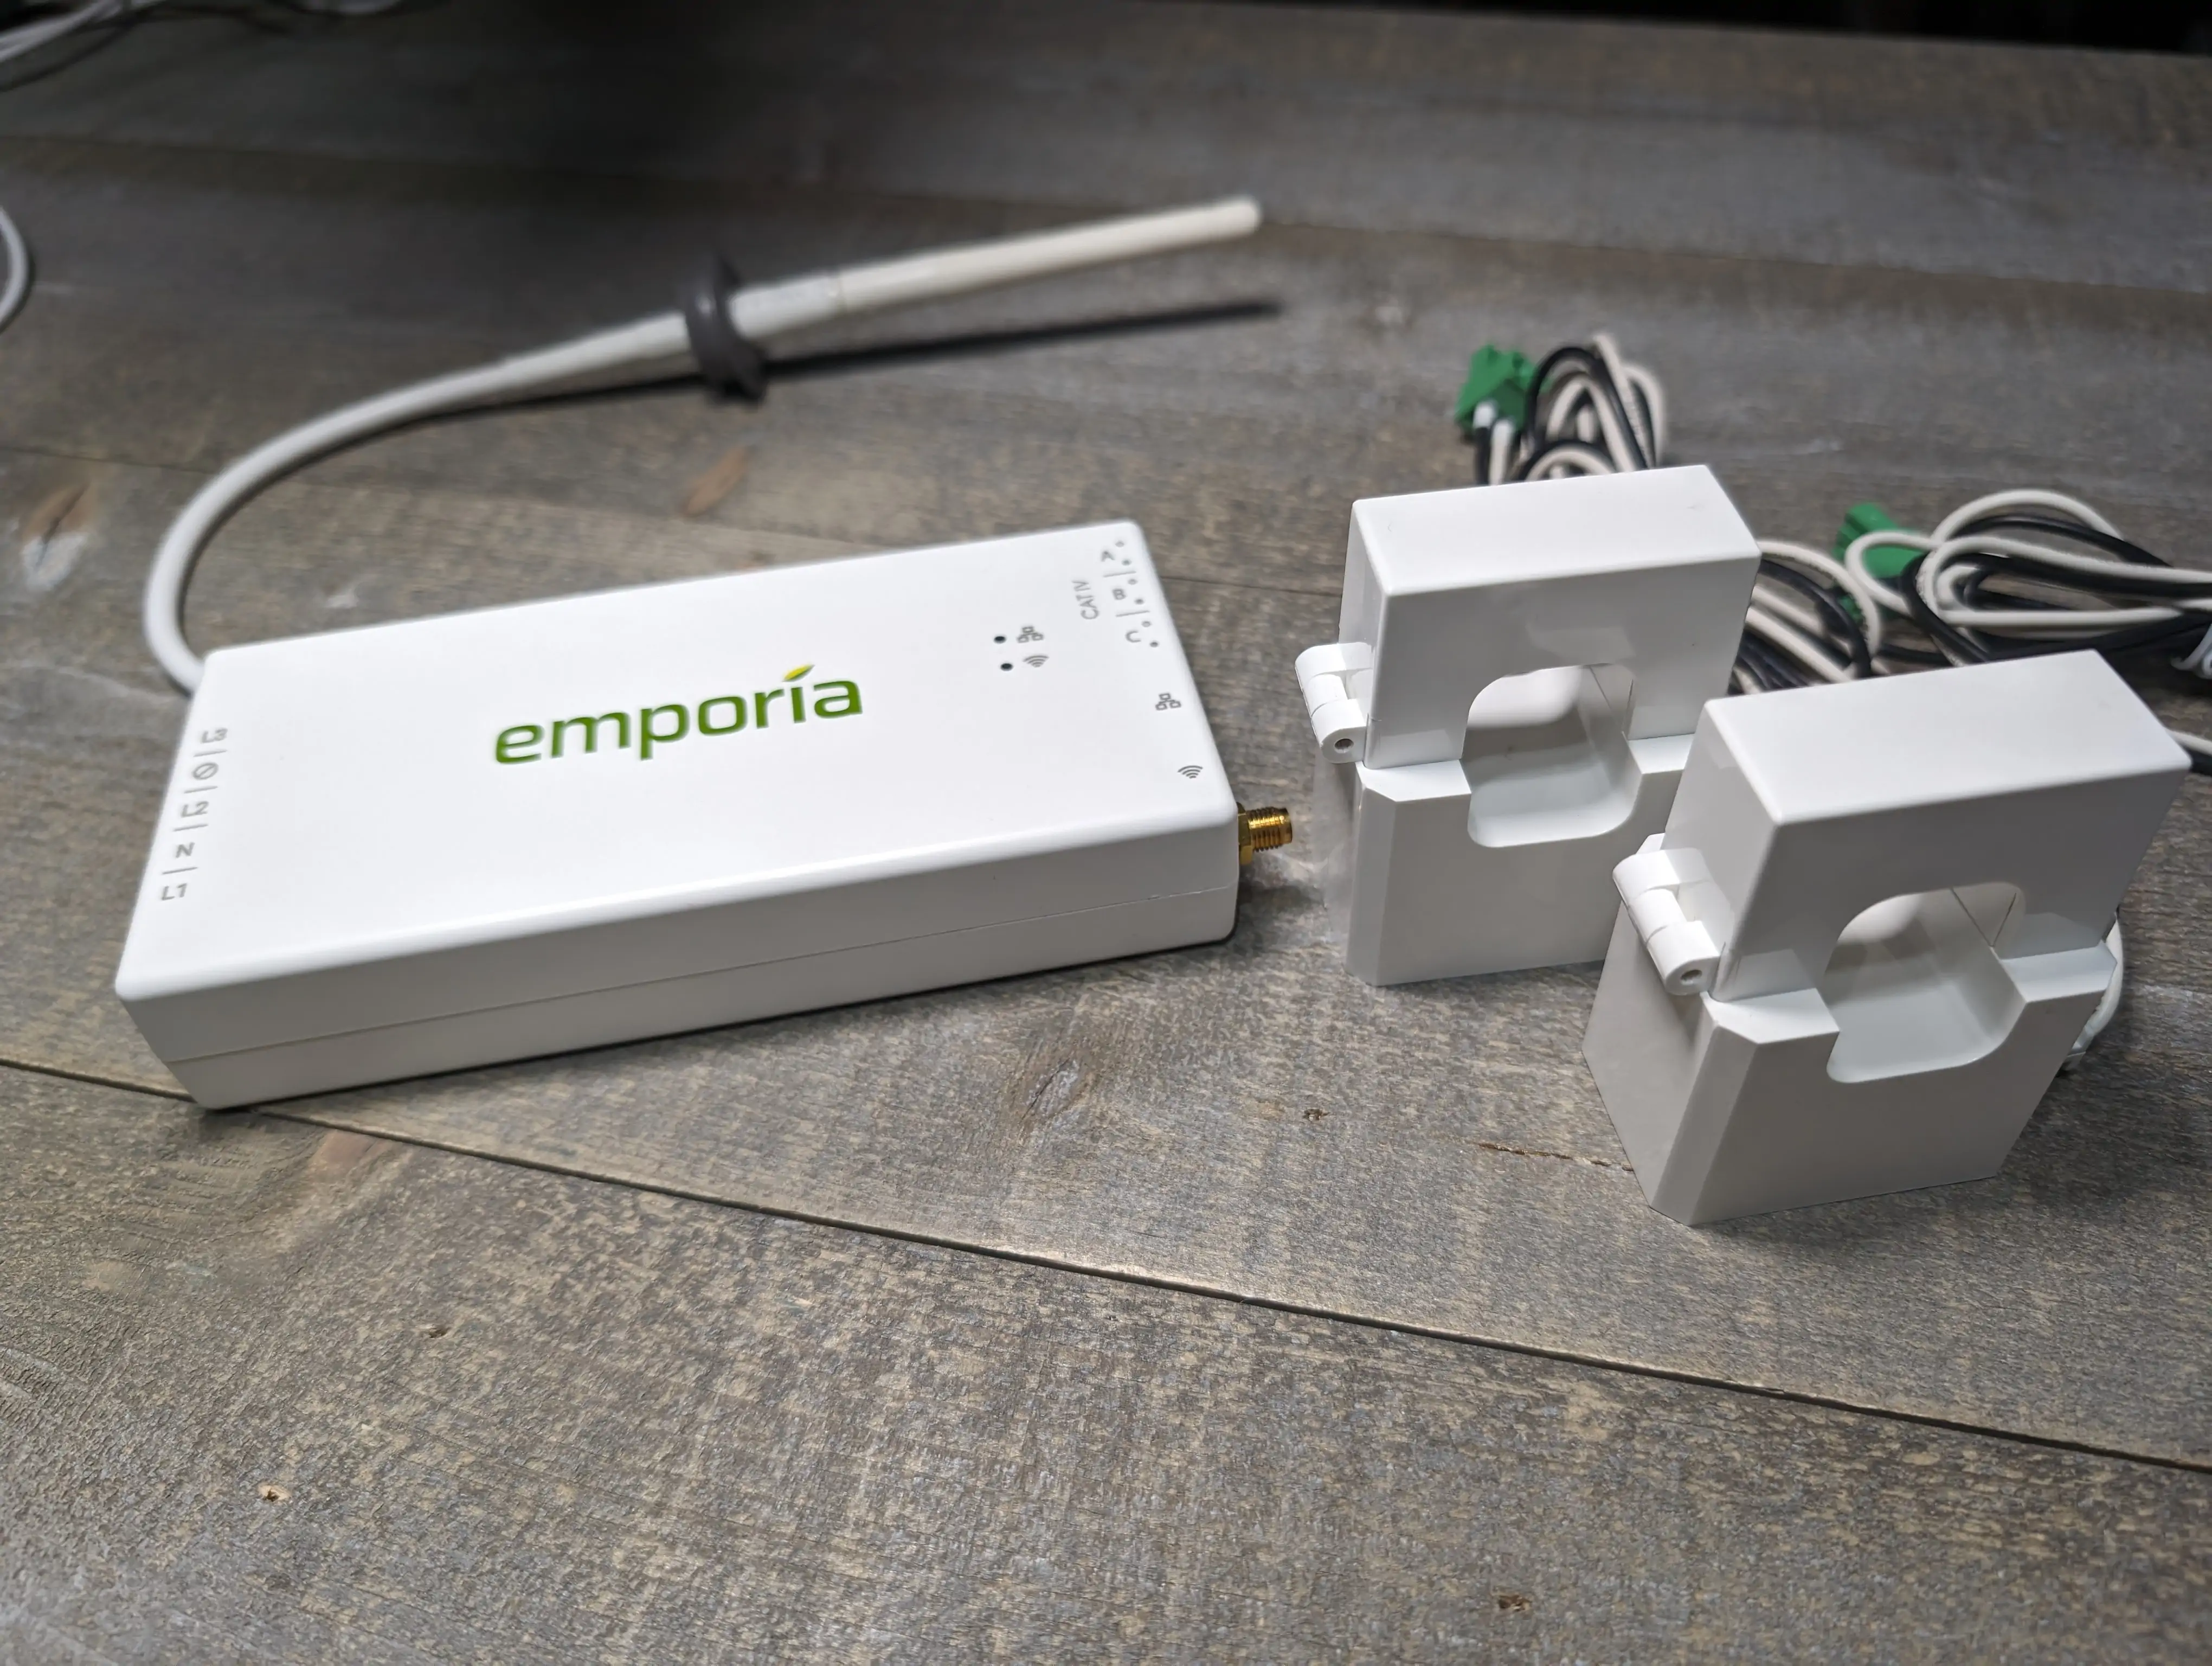
We've covered the Gen 2 model in the previous video, but in a quick TL;DR. It's a box that goes in your breaker panel to measure the entire power usage in your home as well as breaking it down into additional 16 other circuits in your home for a more detailed usage. This isn't any AI, or guess work involved like other brands, it measures the real world usage of each of the 16 circuits you install the clamps on in the breaker panel.
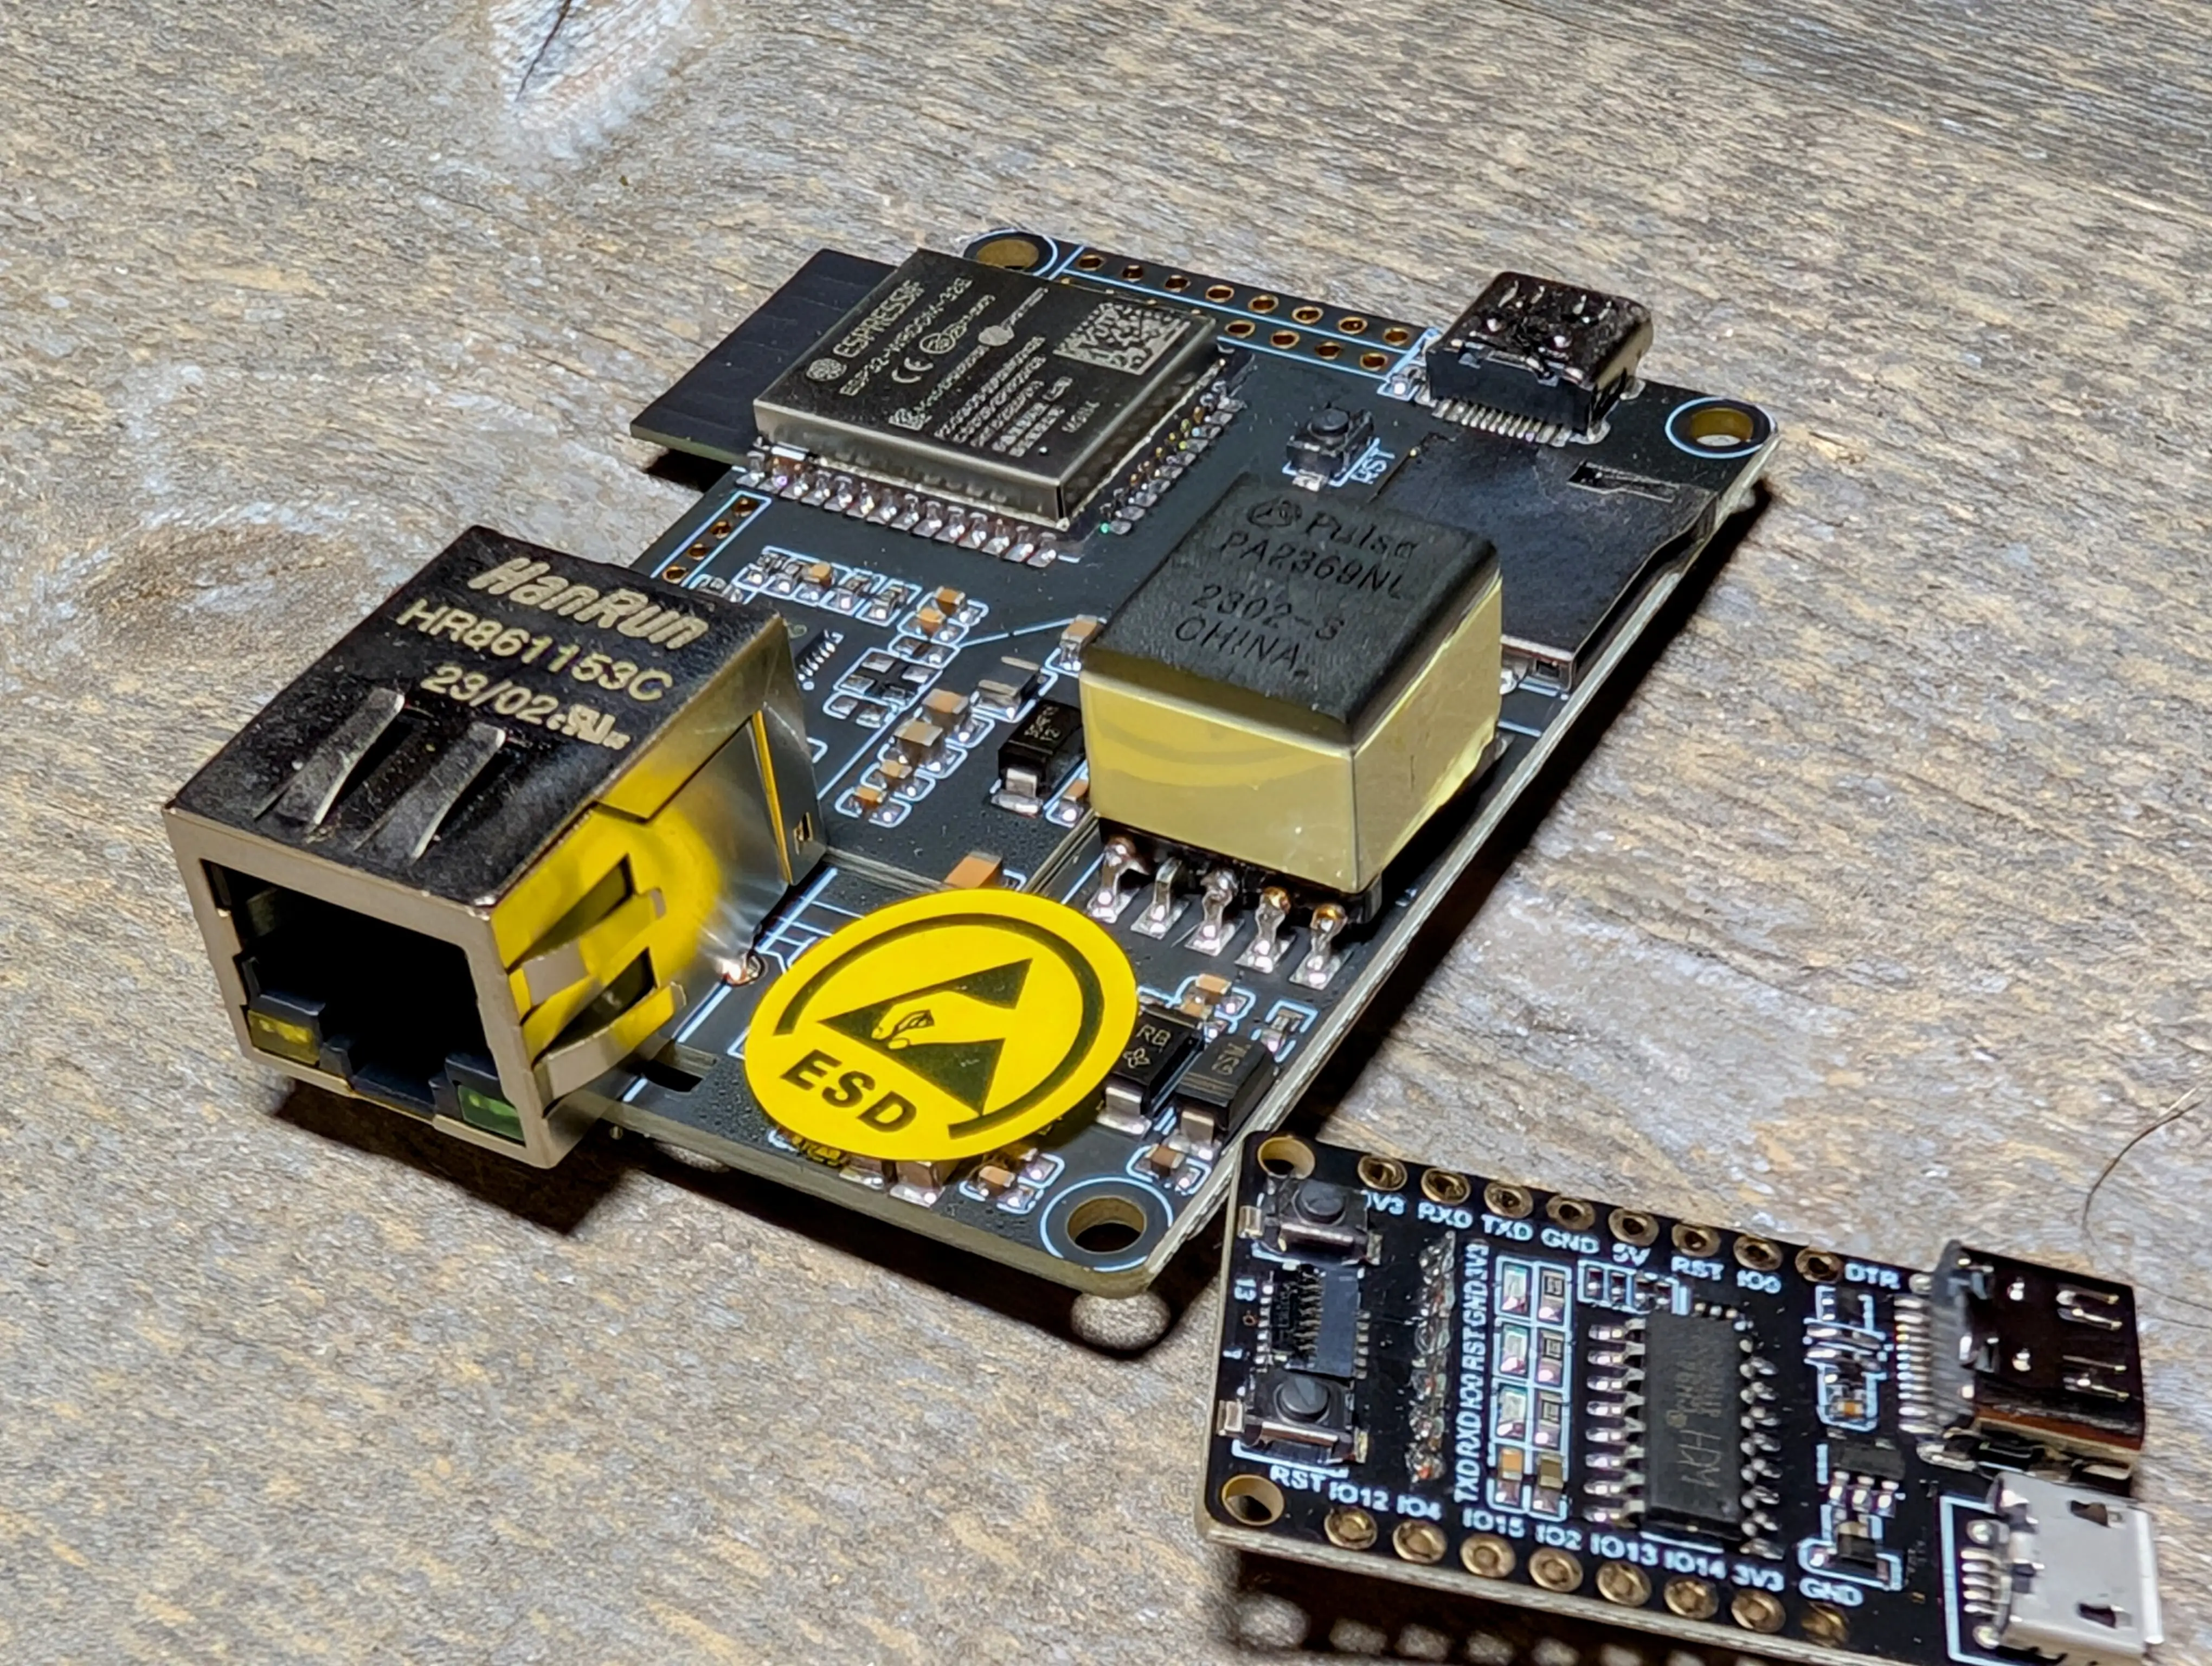
Out of the box the unit is cloud only and feeds your data to another company for use! That's not what we want, it's our electricity usage pattern data! We want it in house and local! Luckily the Gen 3 contains an ESP32 just like the previous Gen 2 model.
What is the Gen 3 all about?
Purchase on Amazon (affiliate) - https://amzn.to/4iEEmNY
Purchase from Emporia - https://shop.emporiaenergy.com/collections/in-panel-energy-monitors
Pay attention to the models, there are 3 packages with 0, 8, and 16 additional CT clamps included.
As we stated above, the Gen 3 comes with an ESP32 again and actually the same power monitoring chips. They've only decreased the size in the board itself while changing all 2.5mm/3.5mm CT clamp plugs to Phoenix style plugs. This means you can now easily cut your CT clamp plugs to length instead of having miles of extra wire to deal with. Probably a good idea to crimp ferrules on them again though after you cut them.
Emporia also added an Ethenet connection, but I'm not comfortable nor do I think my local code allows low voltage to mix with high voltage. I'll stick to Wi-Fi as the antenna is provided with the punchout plug to stick out of the metal panel.
How to install ESPHome
Read more 👉👇