
***UPDATED Guide to Load ESPHome all over the air on Tuya Beken SmartHome Devices
The entire process we covered 3 or 4 months ago just became 10 times easier thanks to efforts of the Libretiny and Tuya-CloudCutter developers!
Remember the days of Tuya-Convert where you could obtain a Tuya based Wi-Fi Smart device, run a quick exploit via a Raspberry-Pi and load your own copy of Tasmota or ESPHome firmware right on the device? Things were patched unfortunately and then later the chipsets were changed to a Beken based chipset that wouldn't run Tasmota at all. So we resorted to chip swapping with hot air guns, soldering, etc. to install our favorite local & open source firmware on the device. Things are now going full circle again where we can load firmware on the Beken chipsets with an over the air exploit called tuya-cloudcutter It is such an awesome process and down right addictive!. Then the bigger accomplishment is the LibreTiny project has it all working with ESPHome! No additional firmware to learn is awesome especially for the ESPHome veterans! Plus it all integrates with Home Assistant like any other ESPHome device does.
Supported Known TUYA Module List: BK7321N, BK7231T, CB1S, CB2L, CB2S, CB3L, CB3S, CB3SE, CBLC5, CBU, WB2L-M1, WB1S, WB2S, WB3L, WB3S, WBLC5
Overview of the Process
Create the Tuya-Cloudcutter Exploit Device using a Rasperry Pi or other Linux Based setup
Install the ESPHome Firmware and Integrate into Home Assistant
What do you need?
First a device that is Beken based and on the list of exploitable devices with tuya-cloudcutter (more are being added all the time!). In this example I'm using the Globe Motion NightLight Plug Second a laptop, NUC, PC, etc or Raspberry-Pi to run the exploit and also load the ESPHome firmware.
Device I've Cloudcut and put ESPHome on
NightLight Plug WB3S - https://amzn.to/3KC5ajh
XMCosy Landscape Lights - https://amzn.to/44aUONW
Lumary Downlights - https://amzn.to/47HGNKr
UltraPro Switch - https://amzn.to/44fI4W7
Xenon Power Strip - https://amzn.to/47P97ea
Cree 5 Button Switch - https://amzn.to/44i15rh
UltraPro Switch - https://amzn.to/3sbh8JQ
Fan/Dimmer Controller - https://amzn.to/3sddaAp
Feit Power Strip - https://amzn.to/45xGlfT
The instructions below are based on using a Raspberry-Pi, if you are using a different computer you will need to adapt by using a different OS flavor but the concept is all the same. If you are more of a full-video type of person and want the complete walk through view the video below.
Full Video
Read more 👉
Building the Raspberry Pi Image
- Download the Raspberry Pi Imager - https://www.raspberrypi.com/software/
- Download the 2022-04-04 Raspberry Pi OS - https://downloads.raspberrypi.org/raspios_lite_armhf/images/raspios_lite_armhf-2022-04-07/2022-04-04-raspios-bullseye-armhf-lite.img.xz
Open the Raspberry Pi Imager - Select Choose OS - Use Custom and browse to the 2022-04-04 copy of RPI you just downloaded above. Choose your SD card as the Storage.
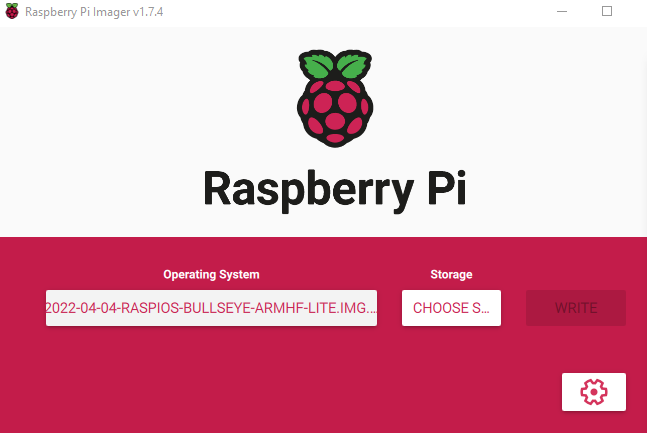
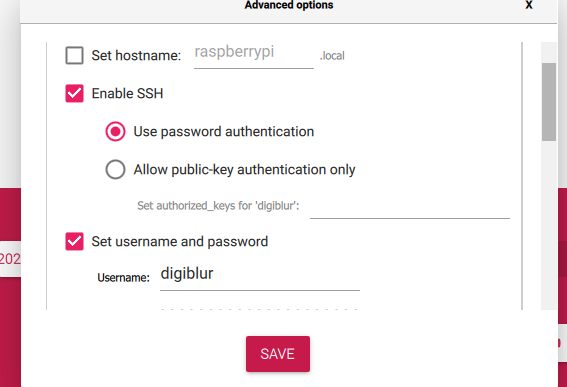
Don't forget to select the gear icon and enable SSH and set your username password
- Write the image to the card and then place it in the Raspberry Pi. Connect the RPI to Ethernet and power it up. Wait a few minutes as the first boot can take some time. Open an SSH terminal such as Putty to the IP address of the RPI. You should see a note about Wi-Fi being unavailable.
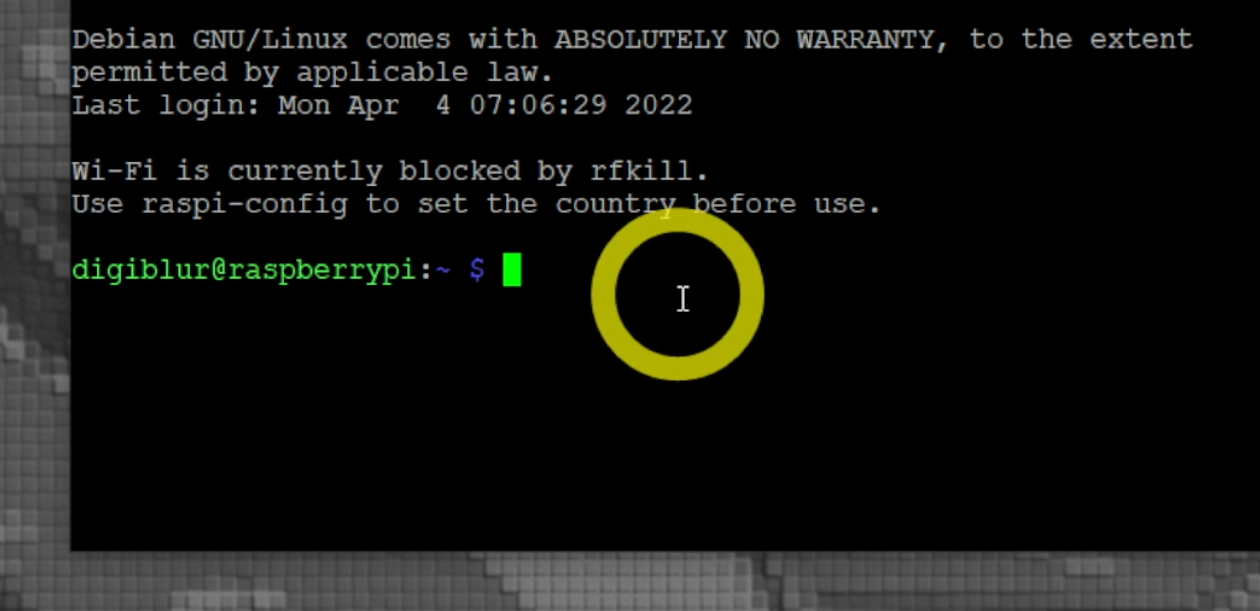
Run
sudo raspi-configgo to Localisation Options -> WLAN Country and set your country. Hit Finish and select Yes to Reboot. SSH back into the RPI do the following steps to prepare for Tuya-CloudCutterInstall Network Manager (only reboot once all files are in place)
sudo apt update && sudo apt install network-managersudo nano /etc/dhcpcd.confthen add linedenyinterfaces wlan0sudo nano /etc/NetworkManager/NetworkManager.confand make it look exactly like
[main]
plugins=ifupdown,keyfile
dhcp=internal

[ifupdown]
managed=true
Reboot the pi with
sudo rebootthen SSH back in.Install Docker with
curl -fsSL https://get.docker.com -o get-docker.sh && sh get-docker.sh
Install / Update Tuya-CloudCutter
If you've already previously built a Tuya-CloudCutter Raspberry Pi, SSH into the Pi and do the following.
cd tuya-cloudcutter
git pull
Otherwise continue with the steps below:
Install git with
sudo apt install gitClone tuya-cloudcutter repo with
git clone https://github.com/tuya-cloudcutter/tuya-cloudcutter
Install ESPHome Kickstarter firmware on the Device
Change to the tuya-cloudcutter folder if necessary with
cd tuya-cloudcutterRun Tuya-Cloudcutter (might take some additional time on the initial run to build the application container)
sudo ./tuya-cloudcutter.sh -rSelect Option #2 - Flash 3rd Party Firmware
Select the Manufacturer/Device Name if your device is listed. If it is not listed, pair the device with the Tuya smartphone app and check for updates on the device to view the firmware version. Restart the cloudcutter script and select
By Firmware versiontry the exploits with the same version number. You might have to try the process multiple times if multiple of the same version are listedSelect the ESPHome-Kickstart firmware when prompted.
Follow the on screen directions to exploit the device and install ESPHome Kickstarter.
Once the device is successfully flashed, connect to the
Kickstart-bk7231access point via WiFi. Navigate tohttp://192.168.4.1if the page does not auto direct. Connect it to your WiFi. Check your Wi-Fi Router/Access Points for a new device with this name and make a not of this IP Address for the next section.

LT Chip Tool to configure the device
If your device already has a device profile on tuya-cloudcutter you can skip the steps below and pull the config from the UPK2ESPHome website https://upk.libretiny.eu/
Download the latest ltchiptool from the releases https://github.com/libretiny-eu/ltchiptool/releases
Open/Run ltchiptool and accept any warnings if necessary.
Select the UPK2ESPHome tab, Click
Grab from ESPHome-Kickstart, enter the IP address not above or the kickstart-bk7321n or kickstart-bk7321t hostnameIf the device is succesfull, the config will be shown of the layout of the GPIO pins. Change any necessary options if you like and hit Generate to create the ESPHome YAML config that will be used in the next step. You can skip the next steps.

- If you receive the following message from ltchiptool:

Your device does not contain an onboard config and there are few options to take from here:
Is your device a dimmer, fan controller or other secondary micro controller based device, also referred to as the ESPHome TuyaMCU component? If so, you can reference this Treatlife fan controller for an example. Remember to try both 9600 and 115200 UART baud rates.
Use the Kickstarter GUI to change each of the pins of the Beken chip high or low to look for any activity such as relays or LEDs turning on or off. Also do the same for the inputs, by pressing any buttons on the device while changing each pin each time for the presses. You can refer to the WB3S, CBU, CB3S, etc chipset data at https://docs.libretiny.eu/docs/status/supported/
Or join us in the Tuya-Cloudcutter Discord channel at https://discord.digiblur.com
Install ESPHome Add-On or Docker Container
- HAOS Users need to add the ESPHome Addon as instructed in https://esphome.io/guides/getting_started_hassio , Docker-Compose users can also find the compose YAML in the same link. unRaid users can search the App Store for the ESPHome container. YES! As of the 2023.9 Release of ESPHome, Libretiny is built in!
Install ESPHome Firmware and Integrate into Home Assistant
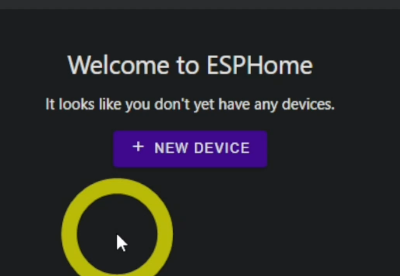
- Create a new device in ESPHome
Copy the generated ESPHome YAML from the LTChipTool or the UPK2ESPHome website https://upk.libretiny.eu/ into the device config. Change any necessary options and select Install. Choose Manual Download -> Modern Format, then Choose the UF2 file option once it is compiled.
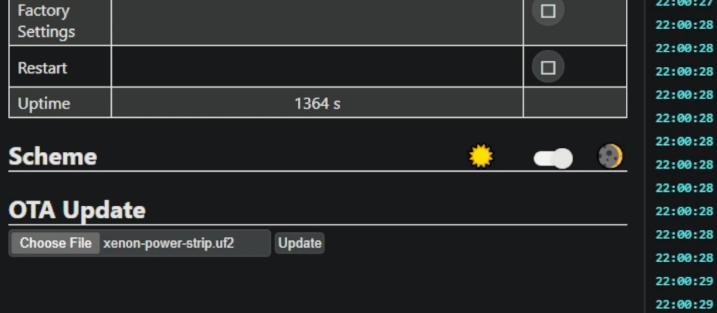
The firmware will compile and download a UF2 file to your computer. Navigate to the original IP or Hostname of the ESPHome Kickstarter. Scroll down to the OTA Update section, select Choose file, select the UF2 file that was created and hit update.
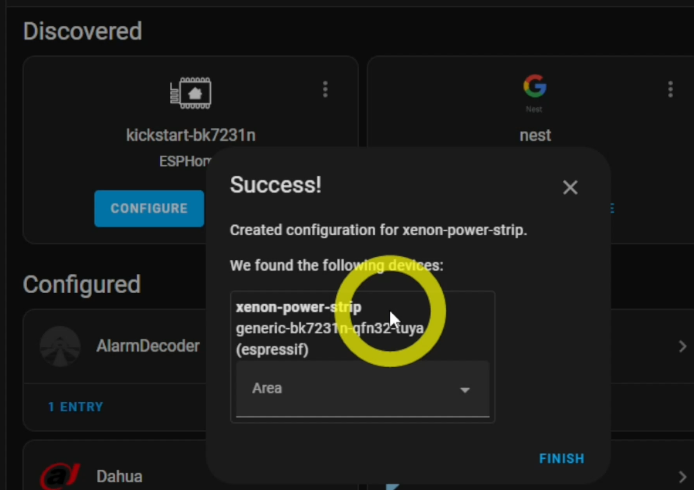
- Once the device updates to the firmwmare for the device. Open Home Assistant and check for new devices that were auto discovered. Depending on your system you might have to manually add a new ESPHome integration device.
Any future updates or changes to the ESPHome based Beken device will all be done through the ESPHome GUI like any normal ESPHome device via the Wirelessly update option of ESPHome.
Devices I've tried and used but there are so many more out there...
NightLight Plug WB3S - https://amzn.to/3KC5ajh
XMCosy Landscape Lights - https://amzn.to/44aUONW
Lumary Downlights - https://amzn.to/47HGNKr
UltraPro Switch - https://amzn.to/44fI4W7
Xenon Power Strip - https://amzn.to/47P97ea
Cree 5 Button Switch - https://amzn.to/44i15rh
UltraPro Switch - https://amzn.to/3sbh8JQ
Fan/Dimmer Controller - https://amzn.to/3sddaAp
Feit Power Strip - https://amzn.to/45xGlfT